Valentine’s Day Red Velvet Brownies: A Taste of Love from My Kitchen to Yours
Ah, Valentine’s Day! A time for romance, connection, and, of course, indulging in something absolutely divine. As Layla, your passionate home cook, I’m beyond thrilled to welcome you into my kitchen, where we’ll be crafting the most delectable Valentine’s Day Red Velvet Brownies. These aren’t just brownies; they’re a symbol of affection, a sweet testament to love that you can bake right at home. Get ready to discover a treat that’s as beautiful as it is delicious, a true celebration of flavor and togetherness.
Growing up, Valentine’s Day was always a special occasion in my family. It wasn’t about grand gestures, but about the small, heartfelt moments, like sharing a homemade dessert. These red velvet brownies are my way of sharing that same warmth and love with you. They are a perfect blend of fudgy goodness, a hint of cocoa, and that signature red hue that screams romance. Let’s embark on this culinary journey together, creating memories that will last long after the last bite.
Why You’ll Absolutely Love These Red Velvet Brownies
These brownies aren’t just another recipe; they’re an experience. A symphony of textures and tastes that dance on your palate. Here’s why you’ll fall head over heels for them:
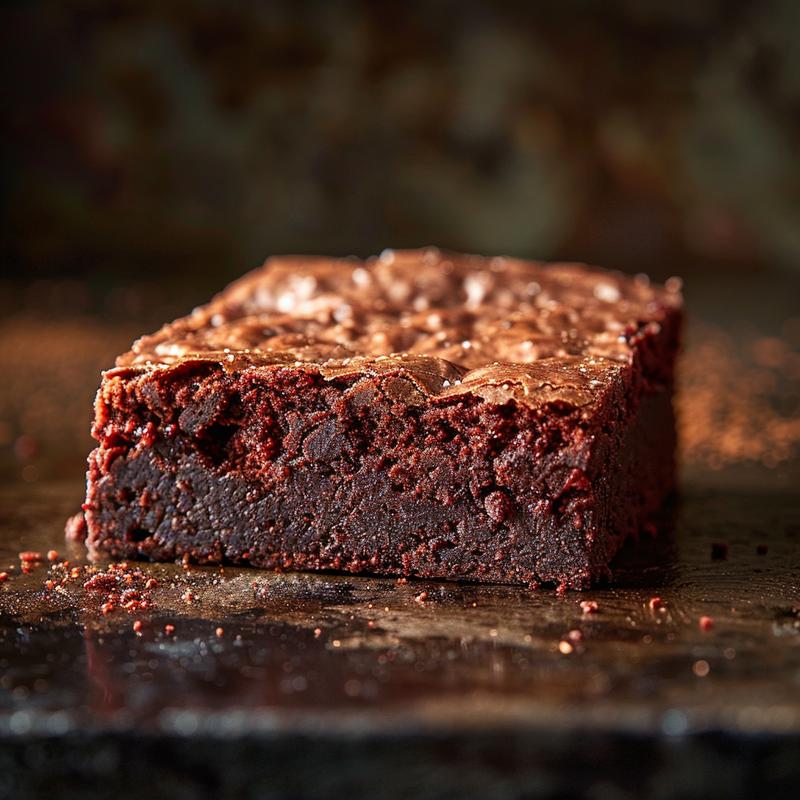
- Fudgy Texture: These brownies are incredibly moist and fudgy, melting in your mouth with every bite.
- Easy to Make: Using a red velvet cake mix as a base makes this recipe incredibly simple, perfect for beginner bakers.
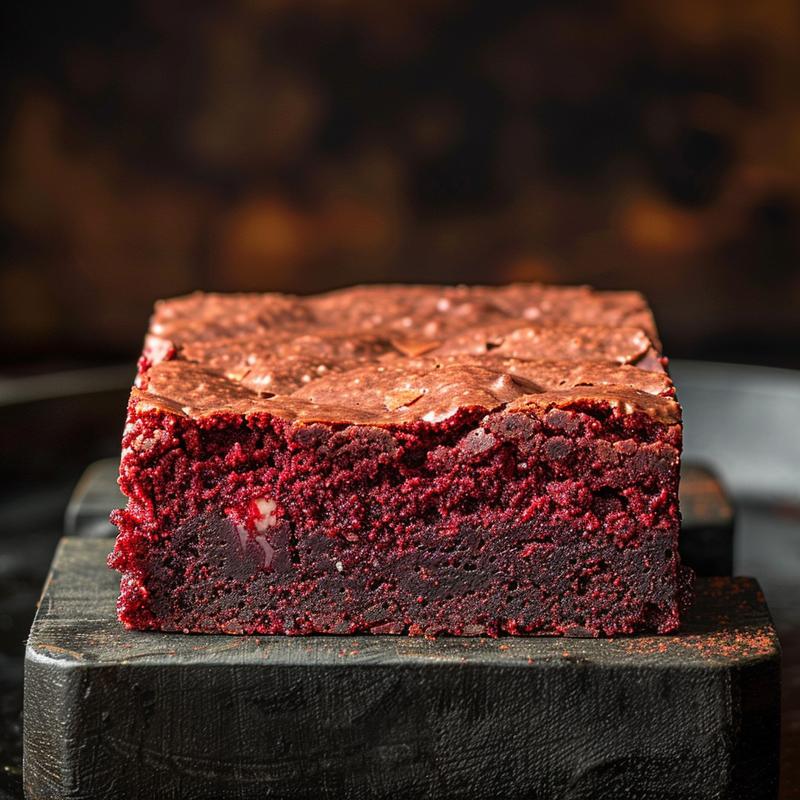
- Festive Appearance: The vibrant red color and sprinkle topping make these brownies visually stunning, ideal for Valentine’s Day.
- Chocolatey Goodness: The subtle hint of cocoa powder complements the sweetness perfectly, creating a balanced and irresistible flavor.
- Perfect for Sharing: These brownies are the ideal treat to share with your loved ones, spreading joy and sweetness on Valentine’s Day.
Think of the joy on your loved one’s face when they taste these brownies, knowing that you poured your heart into baking them. These velvet brownies are more than just a dessert; they’re a gesture of love, a sweet expression of your affection.
Ingredients: Your Palette for a Masterpiece
Let’s gather our ingredients, the building blocks of our sweet masterpiece. Each component plays a crucial role in creating the perfect red velvet brownie experience.
- 1 box (15.25 ounces) red velvet cake mix: The base of our brownies, providing the signature red color and flavor.
- 1/2 cup (1 stick) unsalted butter, melted: Adds richness and moisture, creating that fudgy texture.
- 2 large eggs: Binds the ingredients together and contributes to the brownie’s structure.
- 1/4 cup milk: Adds moisture and helps create a smooth batter.
- 1 teaspoon vanilla extract: Enhances the overall flavor profile, adding a touch of warmth.
- 1/2 cup white chocolate chips: Provides a delightful sweetness and creamy texture.
- 1/4 cup red and pink sprinkles: Adds a festive touch, making these brownies perfect for Valentine’s Day.
Don’t be afraid to experiment with different types of chocolate chips or sprinkles to personalize your brownies. The possibilities are endless! You can even add a cream cheese frosting for an extra layer of indulgence.
Step-by-Step Instructions: Baking with Love
Now, let’s get baking! Follow these simple steps to create the most amazing Valentine’s Day red velvet brownies. Remember, baking is an art, so don’t be afraid to put your own spin on it.
- Preheat and Prepare: Preheat your oven to 350°F (175°C). Grease and flour an 8×8 inch baking pan. This prevents the brownies from sticking and ensures easy removal.
- Combine Ingredients: In a large bowl, combine the red velvet cake mix, melted butter, eggs, milk, and vanilla extract. Mix until well combined, but be careful not to overmix.
- Fold in Chocolate Chips: Gently fold in the white chocolate chips. This ensures they are evenly distributed throughout the batter.
- Pour and Spread: Pour the batter into the prepared baking pan and spread evenly.
- Bake: Bake for 25-30 minutes, or until a toothpick inserted into the center comes out with moist crumbs.
- Cool and Cut: Let the brownies cool completely in the pan before cutting into squares. This prevents them from crumbling.
- Sprinkle and Serve: Sprinkle with red and pink sprinkles before serving.
As you bake, let the aroma fill your kitchen, creating a warm and inviting atmosphere. These the brownies are a labor of love, a gift from your heart to those you cherish.
Pro Tips for Perfect Red Velvet Brownies
To ensure your brownies are absolutely perfect, here are a few pro tips:
- Don’t Overmix: Overmixing the batter can result in tough brownies. Mix until just combined.
- Use Room Temperature Eggs: Room temperature eggs incorporate more easily into the batter, creating a smoother texture.
- Check for Doneness: Use a toothpick to check for doneness. The brownies are ready when the toothpick comes out with moist crumbs.
- Cool Completely: Let the brownies cool completely before cutting. This prevents them from crumbling and makes them easier to handle.
- Use High-Quality Ingredients: Using high-quality ingredients will result in better-tasting brownies.
Remember, baking is a science, but it’s also an art. Don’t be afraid to experiment and have fun! These red velvet cake inspired brownies will surely be a success.
Common Mistakes to Avoid
Even the most experienced bakers make mistakes. Here are a few common pitfalls to avoid when making these red velvet brownies:
- Overbaking: Overbaking can result in dry, crumbly brownies. Keep a close eye on them and check for doneness frequently.
- Using Cold Butter: Cold butter won’t incorporate properly into the batter, resulting in a lumpy texture. Make sure to use melted butter.
- Not Greasing the Pan: Not greasing the pan can cause the brownies to stick, making them difficult to remove.
- Cutting Too Soon: Cutting the brownies before they have cooled completely can cause them to crumble.
Learning from your mistakes is part of the baking process. Don’t be discouraged if your first batch isn’t perfect. Keep practicing, and you’ll be a brownie master in no time! If you follow these tips, you can be sure to create perfect brownies every time.
Variations: Adding Your Personal Touch
Want to add your own unique twist to these red velvet brownies? Here are a few variations to try:
- Cream Cheese Swirl: Swirl a mixture of cream cheese, sugar, and vanilla extract into the batter before baking.
- Chocolate Chunk: Add chunks of dark chocolate or milk chocolate to the batter for an extra chocolatey kick.
- Nuts: Add chopped walnuts, pecans, or almonds to the batter for a nutty crunch.
- Espresso Powder: Add a teaspoon of espresso powder to the batter to enhance the chocolate flavor.
- Peppermint Extract: Add a few drops of peppermint extract to the batter for a festive holiday flavor.
These variations are just a starting point. Feel free to get creative and experiment with different flavors and ingredients. Your brownies, your rules!
Storage Instructions: Keeping the Love Alive
To keep your red velvet brownies fresh and delicious, follow these storage instructions:
- Room Temperature: Store the brownies in an airtight container at room temperature for up to 3 days.
- Refrigerator: Store the brownies in an airtight container in the refrigerator for up to 1 week.
- Freezer: Freeze the brownies in an airtight container for up to 2 months. Thaw at room temperature before serving.
Proper storage will ensure that your brownies stay moist and flavorful for as long as possible. This is especially important if you are making them ahead of time for Valentine’s Day.
Frequently Asked Questions (FAQ)
Here are some frequently asked questions about making red velvet brownies:
- Can I use a different size pan? Yes, but you may need to adjust the baking time.
- Can I use a different type of chocolate chip? Absolutely! Feel free to use milk chocolate, dark chocolate, or even peanut butter chips.
- Can I make these brownies gluten-free? Yes, use a gluten-free red velvet cake mix.
- Can I add frosting to these brownies? Of course! A cream cheese frosting would be a perfect complement.
If you have any other questions, feel free to ask! I’m here to help you create the perfect batch of brownies.
Serving Suggestions: Sharing the Sweetness
These red velvet brownies are delicious on their own, but here are a few serving suggestions to elevate the experience:
- With Ice Cream: Serve warm brownies with a scoop of vanilla ice cream or chocolate ice cream.
- With Whipped Cream: Top the brownies with a dollop of whipped cream and a sprinkle of chocolate shavings.
- With Berries: Serve the brownies with fresh strawberries, raspberries, or blueberries.
- With Coffee or Tea: Enjoy the brownies with a cup of coffee or tea for a cozy treat.
No matter how you choose to serve them, these brownies are sure to be a hit. They are the perfect way to show your valentine’s how much you care. These these brownies are not only delicious but also visually appealing, making them a truly special treat for your valentine s day. They are the perfect s day red day red velvet treat.
From my kitchen to yours, I hope you enjoy these Valentine’s Day Red Velvet Brownies. May they bring joy, sweetness, and a whole lot of love to your celebration. Remember, cooking is a way of sharing a piece of yourself with the world. So, go ahead, bake with passion, and spread the love! This recipe is truly one to share with loved ones.

Valentines Day Red Velvet Brownies
Ingredients
Method
- Preheat oven to 350°F (175°C). Grease and flour an 8x8 inch baking pan.
- Combine cake mix, melted butter, eggs, milk, and vanilla extract. Mix well.
- Gently fold in the white chocolate chips.
- Pour batter into the prepared pan and spread evenly.
- Bake for 25-30 minutes, or until a toothpick comes out with moist crumbs.
- Cool completely before cutting into squares.
- Sprinkle with red and pink sprinkles before serving.
Notes
Loved this recipe? Save it to your favorite Pinterest board so you can easily find it later! ✨