Howdy, folks! Clay Layla here, your friendly neighborhood pitmaster, stepping away from the smoker for a spell to share something a little sweeter. I’m talkin’ about Heart Shaped Jam Cookies. Now, I know what you might be thinking: ‘Clay, what’s a BBQ guy doing with cookies?’ Well, let me tell you, a good cook knows their way around all sorts of deliciousness. And these cookies? They’re not just delicious; they’re downright heartwarming. Whether you’re baking for Valentine’s Day, a special occasion, or just because, these little gems are sure to bring a smile to anyone’s face. So, ditch the store-bought stuff and let’s get baking! I’ve been making these for years, and they’re always a hit.
Why You’ll Love This Recipe
These aren’t your average sugar cookies. These are Heart Shaped Jam Cookies – a delightful combination of buttery, tender cookie and sweet, fruity jam. They’re easy to make, fun to decorate, and absolutely irresistible. If you’re looking for a simple yet impressive treat, you’ve found it. They’re perfect for baking with kids, too! Here’s why you’ll fall head over heels for this recipe:
- Easy to Make: Simple ingredients and straightforward instructions make this recipe perfect for bakers of all skill levels.
- Customizable: Use your favorite jam flavors to create a cookie that’s uniquely yours.
- Adorable: The heart shape and dusting of powdered sugar make these cookies visually appealing and perfect for gifting.
- Delicious: The buttery cookie and sweet jam filling create a flavor combination that’s simply irresistible.
Ingredients You’ll Need
Let’s gather our ingredients. The beauty of this recipe is that it uses simple, everyday ingredients that you probably already have in your pantry.
- 1 cup (2 sticks) unsalted butter, softened: The foundation of our buttery, tender cookies. Make sure it’s softened, not melted!
- 3/4 cup granulated sugar: Adds sweetness and helps create a light and fluffy texture.
- 1 large egg: Binds the ingredients together and adds richness.
- 1 teaspoon vanilla extract: Enhances the flavor of the cookies. Don’t skimp on the good stuff!
- 2 1/2 cups all-purpose flour: The structure of our cookies. Measure it carefully to avoid dry cookies.
- 1/4 teaspoon salt: Balances the sweetness and enhances the other flavors.
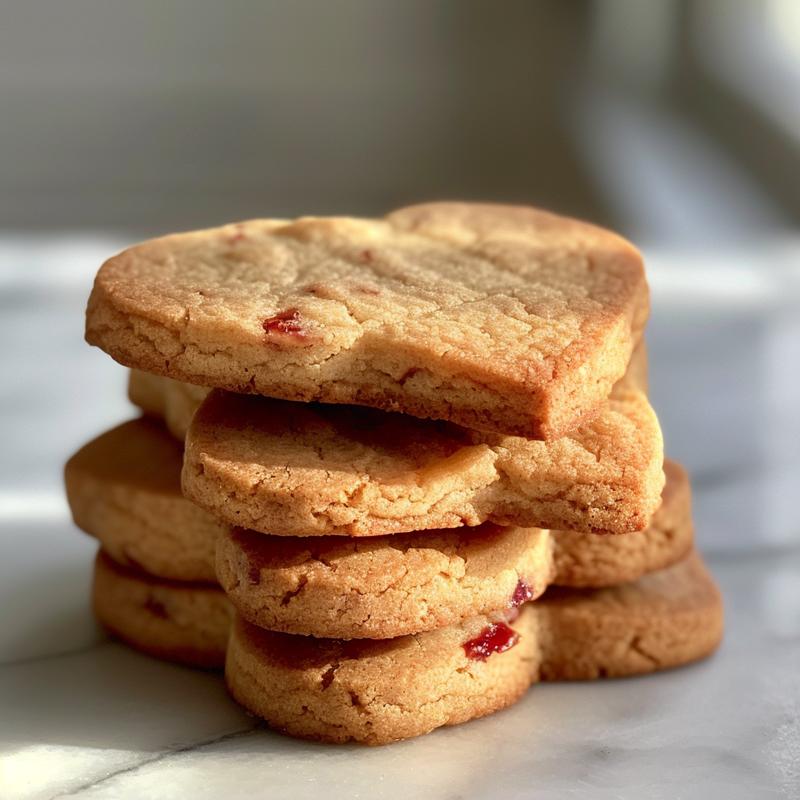
- 1/2 cup jam (strawberry, raspberry, or your favorite): The star of the show! Choose a high-quality jam with a flavor you love. I personally love using homemade jam, but store-bought works just fine.
- Powdered sugar, for dusting (optional): Adds a touch of elegance and sweetness.
Step-by-Step Instructions: Let’s Get Baking!
Alright, let’s get down to business. Follow these step-by-step instructions, and you’ll be enjoying these delicious cookies in no time.
- Cream the Butter and Sugar: In a large bowl, cream together the softened butter and granulated sugar until light and fluffy. This is where a stand mixer comes in handy, but a hand mixer or even a good old-fashioned whisk will work too. The key is to incorporate plenty of air for a tender cookie.
- Add the Egg and Vanilla: Beat in the egg and vanilla extract until well combined. Make sure the egg is at room temperature for the best results.
- Combine Dry Ingredients: In a separate bowl, whisk together the all-purpose flour and salt. This ensures that the salt is evenly distributed throughout the dough.
- Combine Wet and Dry Ingredients: Gradually add the dry ingredients to the wet ingredients, mixing until just combined. Be careful not to overmix the dough, as this can result in tough cookies. The dough should be soft and slightly sticky.
- Chill the Dough: Divide the dough in half, flatten each half into a disc, wrap in plastic wrap, and chill for at least 30 minutes. This is crucial for preventing the cookies from spreading too much in the oven. You can also chill the dough for longer, even overnight.
- Preheat and Prep: Preheat oven to 375°F (190°C). Line baking sheets with parchment paper. This prevents the cookies from sticking and makes cleanup a breeze.
- Roll Out the Dough: On a lightly floured surface, roll out one disc of dough to about 1/8 inch thickness. Work quickly and efficiently to prevent the dough from warming up too much.
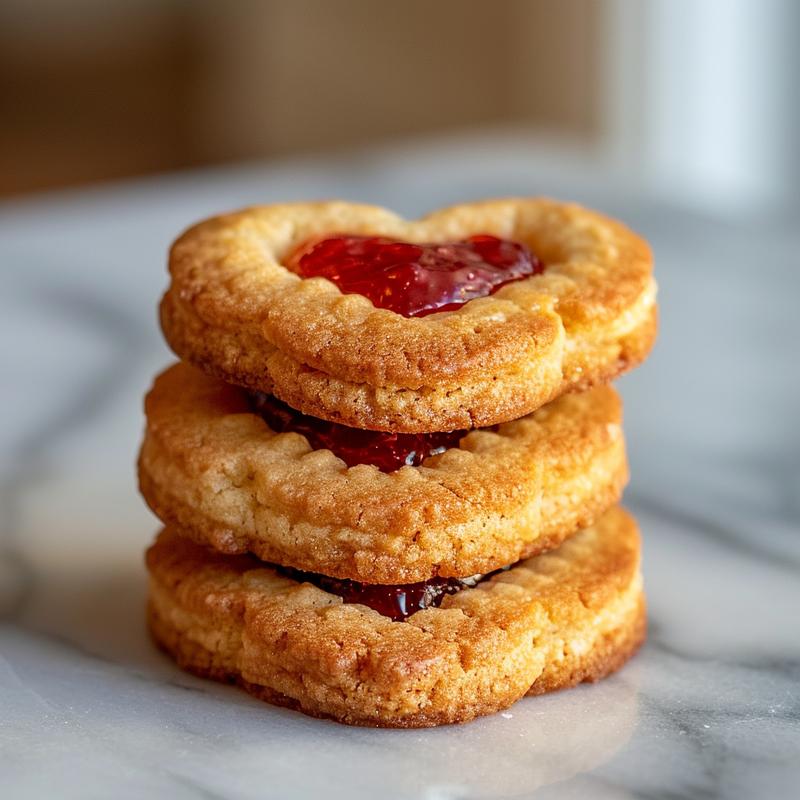
- Cut Out the Cookies: Use a heart-shaped cookie cutter to cut out cookies. Use a smaller heart-shaped cutter to cut out the center of half of the cookies. This creates the classic sandwich cookie look.
- Bake the Cookies: Place the cookies on the prepared baking sheets, leaving a little space between each cookie. Bake for 8-10 minutes, or until the edges are lightly golden. Keep a close eye on them, as they can burn easily.
- Cool the Cookies: Let the cookies cool on the baking sheets for a few minutes before transferring them to a wire rack to cool completely. This prevents them from breaking.
- Assemble the Cookies: Once the cookies are cool, spread a small amount of jam on the solid heart cookies. Dust the cutout heart cookies with powdered sugar (optional). Carefully place the cutout heart cookies on top of the jam-covered cookies to create sandwich cookies.
- Serve and Enjoy: Serve these delightful Heart Shaped Jam Cookies with a cup of tea or coffee, or simply enjoy them on their own. They’re perfect for sharing with loved ones.
Pro Tips for Perfect Heart Shaped Jam Cookies
Want to take your cookie game to the next level? Here are a few pro tips to help you achieve cookie perfection. These cookies, when done right in my opinion, are a real treat.
- Use Room Temperature Butter: This is crucial for achieving a light and fluffy texture. Take the butter out of the refrigerator at least an hour before you start baking.
- Don’t Overmix the Dough: Overmixing develops the gluten in the flour, resulting in tough cookies. Mix until just combined.
- Chill the Dough: This prevents the cookies from spreading too much in the oven and helps them hold their shape.
- Use Parchment Paper: This prevents the cookies from sticking and makes cleanup a breeze.
- Don’t Overbake the Cookies: Overbaked cookies will be dry and crumbly. Bake until the edges are lightly golden.
Common Mistakes to Avoid
Even the best bakers make mistakes sometimes. Here are a few common pitfalls to watch out for when making these cookies.
- Using Melted Butter: This will result in flat, greasy cookies.
- Overmeasuring the Flour: This will result in dry, crumbly cookies. Use a kitchen scale for the most accurate measurement.
- Skipping the Chilling Step: This will result in cookies that spread too much in the oven.
- Overbaking the Cookies: This will result in dry, hard cookies.
- Using Too Much Jam: This will make the cookies soggy. Use a small amount of jam, just enough to cover the surface of the cookie.
Variations: Get Creative!
The beauty of this recipe is that it’s so versatile. Here are a few variations to try.
- Lemon Curd Filling: Swap the jam for lemon curd for a tangy twist.
- Chocolate Glaze: Drizzle the finished cookies with melted chocolate for an extra touch of decadence.
- Sprinkles: Decorate the cookies with sprinkles before baking for a festive touch.
- Different Shapes: Use different cookie cutters to create cookies in different shapes.
- Different Flavors of Jam: Experiment with different flavors of jam to find your favorite combination.
How to Store Your Heart Shaped Jam Cookies
These cookies are best enjoyed fresh, but they can be stored in an airtight container at room temperature for up to 3 days. They can also be frozen for longer storage. To freeze, place the cookies in a single layer on a baking sheet and freeze until solid. Then, transfer them to an airtight container and freeze for up to 2 months. Thaw at room temperature before serving. To keep them in tip-top shape, that’s the best way!
Frequently Asked Questions (FAQ)
Got questions? I’ve got answers! Here are a few frequently asked questions about this recipe.
- Can I use salted butter?: Yes, but omit the salt in the recipe.
- Can I use a different type of flour?: All-purpose flour works best for this recipe.
- Can I make the dough ahead of time?: Yes, the dough can be made ahead of time and stored in the refrigerator for up to 2 days.
- Can I freeze the baked cookies?: Yes, the baked cookies can be frozen for up to 2 months.
- Why are my cookies spreading too much?: This could be due to using melted butter, not chilling the dough, or overbaking the cookies.
Serving Suggestions
These Heart Shaped Jam Cookies are perfect for any occasion. Here are a few serving suggestions:
- Valentine’s Day: A classic choice for a romantic treat.
- Birthday Parties: A fun and festive addition to any celebration.
- Holiday Gatherings: A sweet treat to share with family and friends.
- Gifts: A thoughtful and homemade gift for loved ones.
- Afternoon Tea: A delightful accompaniment to a cup of tea or coffee.
So there you have it, folks! My Heart Shaped Jam Cookies recipe. I hope you enjoy making and eating these delicious treats as much as I do. Remember, the key to great baking is patience, practice, and a whole lotta love. Now get out there and start baking! That’s all from Clay Layla, your Custodian of the Flame, signing off. Happy baking, y’all!

Heart Shaped Jam Cookies Recipe
Ingredients
Method
- Cream butter and sugar until light and fluffy.
- Beat in egg and vanilla extract.
- Whisk together flour and salt in a separate bowl.
- Gradually add dry ingredients to wet ingredients, mix until combined. Do not overmix.
- Divide dough, flatten into discs, wrap, and chill for 30 minutes.
- Preheat oven to 375°F (190°C). Line baking sheets.
- Roll out dough to 1/8 inch thickness.
- Cut out cookies with heart-shaped cutters; cut centers of half the cookies.
- Place cookies on baking sheets.
- Bake for 8-10 minutes, until edges are golden.
- Cool cookies on baking sheets, then transfer to a wire rack.
- Spread jam on solid heart cookies.
- Dust cutout cookies with powdered sugar (optional).
- Place cutout cookies on top of jam-covered cookies.
- Serve and enjoy!
Notes
Loved this recipe? Save it to your favorite Pinterest board so you can easily find it later! ✨